


4 Tips for the Perfect Chevron Flooring Pattern
There are tons of hardwood flooring options on the market, but how do you choose the right one? In all honesty, there’s no wrong choice, only a preferred option. However, if chevron flooring fascinates you, you’ve come to the right place.
In this article, you’ll learn tips for chevron flooring patterns and how they can suit your home. The chevron flooring pattern possesses a quaint symmetrical style that adds a nice touch to your home’s aesthetic.
Furthermore, we’ll show you how to achieve this chevron pattern for your home. Hence, you’ll be able to equip your home with this unique and uniform look.
What is the Chevron Flooring Pattern?
Before we delve deeper, let’s go over the basic definition and characteristics of chevron flooring. After all, understanding the pattern is the best way to install chevron flooring properly.
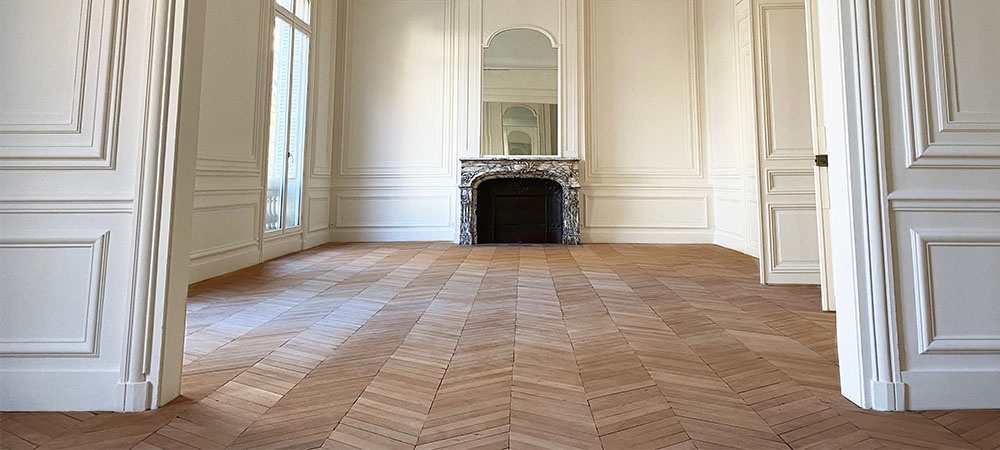
Chevron flooring is a type of parquet flooring. Now, you’ve probably come across parquet flooring in the form of the herringbone design. The herringbone design is famous for its zigzag design. However, the chevron flooring doesn’t follow the zigzag format of your standard parquet floor.
Unlike parquet flooring, which possesses straight ends that bend at sharp angles, chevron flooring has its straight ends cut at extremes. A significant tip for the chevron flooring pattern is its resemblance to the standard chevron logo, which comes in a “V” shape.
Where the ends of the chevron meet to create a precise continuous bend different from other parquet floors. Chevron flooring has become increasingly popular over the years. Due to the flooring’s desirable look, it has become a beacon of craftsmanship and quality.
Installing Chevron Flooring
Laying chevron flooring can be a complicated task. Hence, we advise that you employ the services of a qualified fitter in most cases. This is unlike herringbone flooring; whose blocks easily overlap each other for easy fitting.
Chevron flooring features straight, consistent blocks that run in a single file. Hence, there’s no support for the edges.
Therefore, you must be careful with how the chevron blocks are laid onto the floor’s surface. It would help if you made sure that the blocks fit perfectly together. An uneven levelling of the blocks will give off an odd and uncomfortable look.
Differences Between Chevron and Herringbone Flooring
Before starting your chevron floor installation, let’s hammer out the fundamental differences between chevron and herringbone flooring.
|
Chevron Flooring |
Herringbone Flooring |
| Planks are cut at 45 degrees | Planks are cut at 90 degrees |
| They possess a continuous zigzag pattern | They possess a scattered zigzag pattern |
| Can cost more due to the angle of cut | May cost less due to the angle of cut |
| Patterns move toward a central point | Patterns sway at endpoints |
![]()
What are the Best Hardwood Options for Chevron Flooring?
Another excellent tip for chevron flooring patterns is the hardwood used in its manufacturing process. Whereas the popular choice of hardwood to go for is oak, there are other options on the market.
Here are some other hardwoods that can give you an excellent chevron flooring design
- Iroko
- Walnut
- Hickory
- Doussie
Ultimately, regardless of the hardwood you choose, you’ll be getting yourself a chevron pattern.
Related Article: When To Choose Chevron Over Herringbone Flooring?
Tips for Making the Perfect Chevron Flooring Pattern
Let’s go into the tips and installation hacks for chevron flooring. In this segment, we’ll cover the process of installing chevron flooring.
The installation process can be tricky due to the intricate design of the chevron blocks. Hence, you’ll need to double-check the row alignment of the blocks. Reviewing is an essential tip in achieving the chevron pattern effectively.
Overall, we advise that you get professional help installing chevron flooring. However, if you feel like you can install the chevron blocks, here are some of the tools you’ll need
- Dust mask
- Safety glasses
- Tape measure
- Pencil
- Ruler
- Hammer
- Trowel
- Spacers
- Chalk
Once you have your equipment, you can follow these tips for your chevron flooring pattern installation.
Preparing the Subfloor
Before laying the chevron flooring, you must ensure that the subfloor is in optimal condition. As a matter of fact, if you install chevron floorboards over a poor subfloor, you’ll have problems later.
- The main thing to ensure is that the subfloor is levelled correctly.
- Ensure to sand down any uneven elevations.
- Consequently, ensure to fill up any holes or depressions to an even level.
- Furthermore, thoroughly clean the subfloor and remove any loose particles.
- Eliminating contamination is the best way to install chevron flooring without any issues.
- Lastly, check the moisture content of the subfloor before placing the chevron floor.
Make certain the moisture content of your subfloor follows your city’s suggested standards. Once you’ve confirmed the status of your subfloor, move on to the next step.
Determining and Measuring the Floor Layout
Accuracy is of utmost importance and a vital tip to achieving uniform chevron patterns. Therefore, you must thoroughly measure the floor plan before placing the chevron boards.
- Firstly, you need to identify the center line where the divider line of the chevron pattern will be.
- Next, mark the centre line with chalk.
- Then, you draw parallel lines to the left and right sides of the centerline.
- The parallel lines should stay about 500mm from the center line.
These parallel lines will serve as escorts for the outer edges of the chevron planks. The chalk is an installation hack for the chevron floors to determine their perfect symmetry.
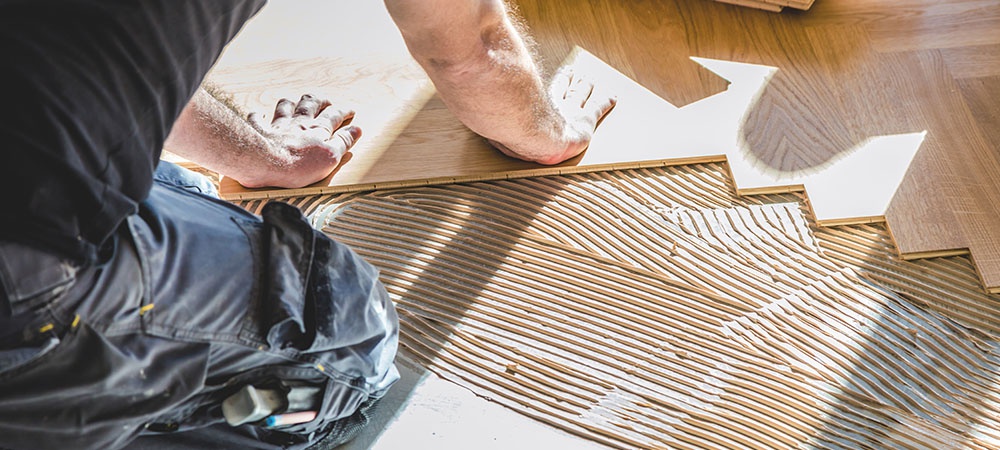
Installing the Planks
To begin, you must apply glue over the outer parts of the first board you’ll be installing. A trowel will better serve to spread the glue evenly.
- The first plank should then be placed with the left-side tongue facing the left side of the first board.
- The tongue side should face the rest of the room, and the groove side should be directly next to the initial board.
- After that, ensure once more that the hardwood plank’s top side is parallel to the center line.
This is how to start the chevron floor installation while preventing further complications.
- Repeat the above process for the right-side tongue-facing plank.
- Next, press the right tongue board down on the moisture barrier.
- Ensure to push down the board gently, lest you shift the glue underneath.
As you place the board, put it down gently and let the groove and tongue system lock-in. Once you’re done with the first plank, repeat the action for the second plank and the rest.
Final Touches
Once you’ve followed these tips for installing chevron flooring patterns, double-check for misalignments. The glue underneath wouldn’t have hardened yet. Hence, if you spot any discrepancies, you can quickly correct them.
Once satisfied, leave the chevron floors to set for about 24 hours before bringing any furniture in. So, now that you’ve installed the chevron flooring, you can flaunt your intricately designed floorboards. Your home resale value would also go up.
Related Article: How Much Does Chevron Hardwood Flooring Cost?
Conclusion
We hope these tips for chevron flooring patterns installation have been helpful. Remember that floorboards can be tricky. So, carefully plan out the layout to guarantee a perfectly aligned structure.
However, you might feel the installation process might need to be simplified for you. You can check out our collection of easy-to-install chevron flooring planks at Three Trees Flooring. The planks come in different designs and feature easy-to-fit parts.